FishwithJD

The web's best fishing magazine

  • Start Here
  • Guided Trips With JD
  • Catch Steelhead
  • Store
  • JD’s Gear
    • Steelhead
    • Kokanee
    • River Salmon Trolling
    • Plug Fishing for Salmon
    • Light Tackle Surf Perch
  • Techniques
    • Bass
    • Boats & Boating
    • Cooking
    • Fly Fishing
    • Salmon
    • Saltwater
    • Shad
    • Steelhead
    • Stripers
    • Sturgeon
    • Trout & Kokanee

JD’s Books: Perfect Reading Material for the Quarantine!

March 30, 2020 By JD Leave a Comment

Can’t fish? Well, you might as well read about it! Since you are probably stuck at home these days, now’s a great time to catch up on your fishing techniques.

Here’s my catalog of how-to titles, available through Amazon.

The Ultimate Guide to Steelhead Bank Fishing: (263 pages, $11.99 Digital Copy)

Jam packed with all the how-to info you need become a proficient bank angler: reading the water, curing bait rigging diagrams and tons of other stuff — it’s all in here

Light Tackle Surf Perch: (52 pages, $2.99 Digital Copy)

Thanks to detailed diagrams, photos and descriptive text, you’ll learn how to identify likely looking perch hang outs like troughs, holes, rips and more. Richey also shares secrets he’s learned from commercial perch anglers and other top beach fishermen and passes them on to you so you can be successful.

Plug Fishing For River Fishing: (69 pages, $2.99 Digital Copy)

In this, the most comprehensive guide of its kind ever assembled, JD covers everything you need to know to consistently catch river salmon on wobbling plugs like FlatFish and Kwikfish.

Packed with full color photographs and diagrams, the book covers everything from the basics to sophisticated tricks used by pro guides.

Light Tackle Delta Striper Secrets: (58 pages, $2.99 Digital Copy)

 In this book, JD shares the pro tips you need to catch striped bass in the Delta. Packed with photos and insightful diagrams, Richey shows you how to locate stripers, what to look for in a spot, how to work the tide to you advantage… and how to get bit using light tackle techniques like topwater, swimbaits and jigging. 

Side Drifting for Steelhead: (Paperback, $14.53 Digital Copy)

In this book, JD shares everything you need to know to become a successful side-drifter. Best describe ed as a family of techniques, side-drifting includes three methods–freedrifting, side gliding, boondogging. Each method is explained in depth and includes the basic gear you’ll need. 

Filed Under: Techniques Tagged With: beach fishing, fishing tips, How-to, king salmon, Salmon, Steelhead, striped bass, surf fishing, surf perch

How to Plunk for Steelhead

January 6, 2017 By JD 6 Comments

Sadly, we can’t always have perfect “steelie green” water conditions on the river. There are times when the water is still way up high and a few days away from ideal…but you just have to fish anyway. What to do?

Go Plunking, that’s what!

Plunking is a lot like glorified catfishing: You toss your gear out and put your rod in a holder or against a forked stick and wait for a bite. Not exactly what you imagine when you think about steelhead fishing, but it can actually be pretty fun…and productive!

Timing

Each river has its own schedule for dropping and clearing, but the best time to plunk is usually 1 to 5 days after the high water has peaked. You definitely want to fish when the water is on the drop (steelies don’t usually bite very well on a rising river) and you need the river to have more green than brown color to it. It will still probably be up in the trees and you’ll often be dealing with only a foot of visibility or so, but that’s ok.

Location

Most plunking is done on the lower sections of rivers, where the chance at fresh migrating steelhead is best. In high water, steelhead will avoid the main channel and instead migrate up the soft edges on the shallow side of the river. Inside bends are best and you usually don’t have to cast more than about 20 feet out. In some cases, the fish will be right at your feet, so avoid the urge to cast long distances.  High water looks intimidating, but in reality, you can eliminate 99 percent of the river and just concentrate your efforts on the near-shore areas that feature less current.

Tackle & Technique

The idea here is to find a nice travel lane and anchor your gear right in the middle of it so migrating fish have no choice but to see your offering. Unlike traditional steelhead fishing, in which we normally want our gear drifting along the bottom, plunking calls for keeping your bait in one spot. In high water, that means using big sinkers — sometimes up to 10 ounces, depending on the spot. You’ll need much heavier gear than you are used to for this technique, so using a standard 8- to 17-pound rated outfit for plunking is like taking a butter knife to a sword fight.

My Favorite Steelhead Fishing Gear

Straight Spin-N-Glos or Spinning/Flashing Cheaters are good offerings for this technique, but I love to put some bait on the hook to sweeten the deal — either roe or sand shrimp work well. Once you are rigged and have found a nice soft water edge, toss the rig out and make sure it stays anchored to the bottom. If not, add more weight or cast closer to shore. Then, use a stick or sand spike style holder for the rod. Some people like to put a bell on the rod to alert them when a fish bites. Plunking is a pretty social scene in a lot of places, so folks often get busy shooting the bull, listening to ball games and barbecuing — and forget to watch their rod tips!

Since by design, you will be fishing shortly after a high water event, be sure to check your rig frequently. There will still be a lot of junk coming down the river that can foul your gear.

By the way, if you’d like to see how all this is done in detail, along with everything you could ever want to know about catching steelies from shore,  check out my 6+ hour long video course, The Ultimate Guide to Steelhead Bank Fishing!

Filed Under: Steelhead, Techniques Tagged With: How-to, plunking, Steelhead

How to Video: Light Tackle Surf Perch Techniques

March 18, 2015 By JD 4 Comments

Here are all the basics you need to get you catching more surf perch off the beach with light gear! We shot this vid in beautiful 4K, so if you have the internet speed, crank this baby up to full resolution!

JD’s top surf perch gear picks

If you’re ready to take your surf perch fishing to the next level, check out my Guidebook: Light Tackle Surf Perch, available today at Amazon!

Light Tackle Surf Perch ebook cover

Filed Under: Saltwater Tagged With: beach fishing, How-to, light tackle, surf perch

How To Rig a Side Planer for Steelhead Plug Fishing

March 9, 2015 By JD 17 Comments

Hot Shot side planer wide angle
Back trolling plugs is one of my favorite ways to fish for steelhead. The way a big steelie tries to atomize a plug that comes wobbling into its lair is so awesome!

It’s a technique that can really yield results – and plugs often attract the biggest fish in the creek: The giant males that are super territorial and all hopped up on hormones.

But you can’t back troll plugs without a boat right? What about the bank angler? Well… good news! With the help of a Luhr Jensen Hot Shot Side Planer (or similar device), you can fish plugs right off the shore. It’s a super fun and productive way to fish, too!

Hot Shot Side Planer
Recently, I’ve met a lot of anglers who are a bit confused as to how to rig a side planer… truth is the instructions on the package are more than just a little hard to follow. So, for those of you like me for whom pictures are better than words, here’s a nice, clear step-by-step look at how to rig one of these handy little steelhead catching tools.

Step 1


Run your main line from the rod tip down through the wire eye at the front of the planer. I like colored braid for planer fishing so I can see where my rig is.

Step 2


Next, the line goes down through the hole on the top side of the side planer.

Step 3


Now, flip the planer over and run the line out through the screw eye on the back end of the unit.

Step 4

How-To-Side-Planer-4
Slide a bead up your main line and then tie a barrel swivel to the end. Your leader goes on the other eye of the swivel. Generally, I’ll run 3 to 6 feet of leader…but for the photo I kept it short, Finish it off with your favorite lure, in this case the super hot Yakima Bait MagLip. On larger waters, I love the 3.5 size. The new smaller 3.0 is awesome on smaller streams or when you have really clear water.

Step 5

How-To-Side-Planer5
Now, you’re going to want to let out some line. With your reel in freespool, hold the planer in one hand and pull several feet of line through (and out the back of) the side planer. How much line you pull through is going to set the distance behind the planer your plug will be fishing. In clear or deep water, longer is better. I typically set my plug 15-30 feet behind the planer.

Step 6


Okay, now you are about ready to get this baby wet! The next step to to ensure you have proper orientation of the planer. The wire rod at the front of the planer should always be pointed towards you and the “outrigger” arm should always face away from you. The arm easily attaches to either side of the planer and the wire will swing either direction. You have to adjust these two things depending on the side of the river you are on and which direction the current is running. Anyway, lock the wire eye into the notch of the planer as shown here.

Step 7


Once the wire is snapped into place facing you, wrap your mainline 4-5 times around the tab at the front of the planer, keeping it tight between the wire eye and the tab. This keeps the planer where you set it (as I mentioned before, usually 15 to 30 feet ahead of the plug). When you start reeling in, the planer will slide back down to your swivel so you can fight the fish without having it well up the line.

Fishing the Side Planer

hot-shot-side-planer-close
Okay, now it’s time to fish! In this case, the river is flowing from right to left, so we have to reverse the sides that the wire and outrigger arm from the ones in the rigging pix. Set the plug in the water and then ease the planer in as well, keeping tension on the line so it doesn’t unravel off the nose tab. You have to put the rig in water with some current, otherwise it won’t go anywhere!

fishing-reel-close-up
With the reel in free spool, use your thumb to let line slip off the reel under tension. You need the tension on the rod side to help to get he planer to pull away from you.

hot-shot-side-planer-overhead_01
It can take a while to work the planer out into the current, but it should eventually start pulling down and across from your position. The Luhr Jensen Hot Shot Side Planer comes with two different sized fins to run on the outrigger arm. Use the large one in slow water and the smaller one in fast water.

hot-shot-side-planer-wide-2Continue to let line out at a controlled rate with your thumb until you get the plug and planer where you want them. As you can see, I have the planer working here near the opposite bank of a smaller river. Once in place, you can just hang out and wait for a fish to come to you or you can slowly walk downstream, back trolling like you would from a boat.
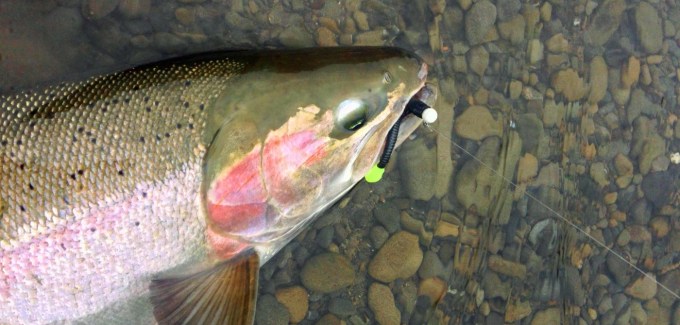
As I mentioned earlier, strikes are often savage! Resist the temptation to set the hook immediately and instead let the fish turn downstream with the plug first.

More Steelhead Techniques

Filed Under: Best of FishwithJD, Steelhead, Techniques Tagged With: backtrolling, hot shot, How-to, maglip, plugs, river, Salmon, side planer, Steelhead

3 Plastic Worm Rigs to Help You Catch More Steelhead

February 25, 2015 By JD 4 Comments

steelhead-and-worm
Steelhead love plastic worms! While there lots of ways you can fish ’em, these three rigs have been hot all up and down the coast this season.

1. Bobber & Worm Jig


For the beginning steelheader, this rig is a great place to start. Very few moving parts and it’s deadly effective! Fish it on a dead-drift and set the float so that the worm is about a foot off the bottom.

I typically use a fixed balsa float like the Thill Turbomaster, a 1/8-ounce jig headhead and a 4″ Mad River Steelhead Worm.

Standard pink is a good all-around worm color color, but the one pictured above is called the “Nightmare” pattern and it is a killer in low, clear water! For this rig, spinning gear is the way to go because its so light.

2. Jet Diver Rig


If you have a boat, back trolling a worm behind a diver (just like you would a plug) is an awesome way to hook steelhead. For several seasons in a row, this is the only rig I guided with for winter steelhead.

Let it out 40-70 feet behind the boat and slowly slip downstream at a pace that’s about half the current’s speed. There are three types of bites on a back trolled worm: The “tap-tap-tap” style, which is often (but not always a smaller fish). Then, you have the two-stager that starts with a solid thump, followed by a pause and then the rod doubles over. And finally, my personal favorite: The “suicide bite” in which the fish grabs the worm and then makes a crazy headlong dash for the sea while you try to hang on.

Disclosure: When you purchase a product through one of the links you find on this site, I may get a very small commission – there’s no extra cost to you. I only highlight products that I have used and believe in. And by using these affiliate links you can help me keep this website up and running (thanks!). For more info, check out our Affiliate Disclosure page here.

Pictured is a 4-inch Mad River worm, but you can drop down to the smaller 3-inch size in super clear water or go up to a 6 incher on big water. Late season big wild bucks are particularly fond of a big pink worm. You can go with a Corkie, Spin-N-Glo or Hard Fish Pill ahead of the worm to give it extra color and buoyancy – or use a floating worm instead.

I generally run a 4- to 6-foot leader down to the worm and an 8- to 16-inch dropper line to the diver. Speaking of divers, you can use size 10 or 20 Luhr Jensen Jet Divers, or go with a Brad’s Bait Diver.

3. Bobber Dog Worm Rig


Here’s one you can use from shore or a boat – the Bobber Dog Worm Rig! For this setup, run a slider or “slip” float like a Clear Drift (pictured), or Beau Mac Float. I generally run a 1/2- to 3/4-ounce model, depending on the size and flow of the river and how much lead I need to get down.

Slinky sinkers work well for this technique as they are very snag resistant. Add a 4- to 6-inch worm and you are in business. For this rig, I ran the worm upside down or “half wacky” style to give it some extra action. You can also thread a worm straight onto the leader like in the Diver rig above. In this case, I have a Hard Fish Pill on the line between the worm and hook to add a little more flotation.

My Favorite Steelhead Fishing Gear

In traditional float fishing (as with the jig and bobber method mentioned earlier), you fish the lure suspended off the bottom. But the Bobber Dog rig is different in that you want your sinker to tap the bottom the whole time. So, set your bobber stop to a depth that’s at least a few feet deeper than the water you are fishing. This is like a drift fishing/bobber fishing hybrid and it can be really effective because your gear is always down in the strike zone.

Give these rigs a try the next time you hit the river. Stay tuned because I’ll be posting more rigs and tips soon!

More Steelhead Techniques

Filed Under: Best of FishwithJD, Steelhead, Techniques Tagged With: bobber, featured, How-to, jet diver, plastic worm, rigs, Steelhead

  • 1
  • 2
  • Next Page »
  • Facebook
  • Instagram
  • Twitter
  • YouTube

JD’s Top Gear Picks

  • Steelhead
  • Kokanee
  • River Salmon Trolling
  • Plug Fishing for Salmon
  • Light Tackle Surf Perch

Legal

  • Privacy Policy
  • Terms & Conditions

Copyright © 2025 Richey Sportfishing